[안드로이드]코틀린 / ListView 추가하기
https://question99.tistory.com/546
[안드로이드] 코틀린 / EditText로 입력하기
앞에 한 내용. https://question99.tistory.com/543 [안드로이드] 코틀린 / 버튼 만들고 이벤트 추가하기 https://question99.tistory.com/542 [안드로이드] 코들린 / HelloWorld 만들기 안드로이드스튜디오 버전 입니다.
question99.tistory.com
■ ListView 추가하기
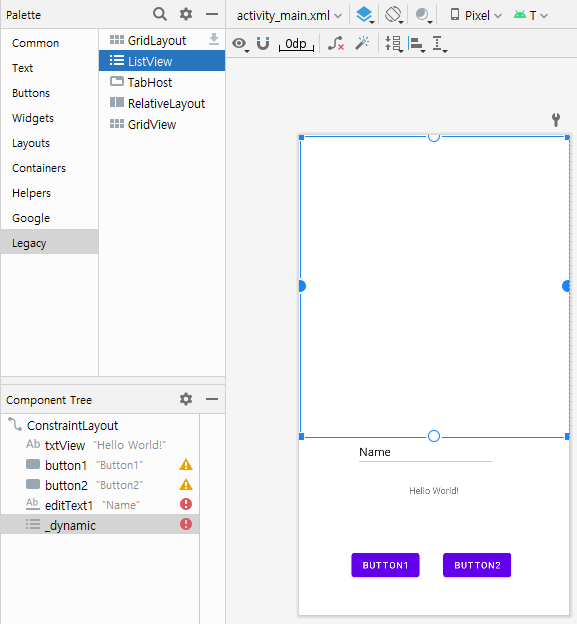
- Palette에서 'ListView'를 드래그해서 화면으로 가져옵니다.
- ListView를 추가하면 id가 없습니다. Code에 아래과 같이 id를 추가합니다.
<ListView
    android:id="@+id/lstView"
    ... />
- 다음과 같이 Design에서 Attributes에서 id에 추가해도 됩니다.

- 왼쪽 하단의 박스를 클릭 후 드래그해서 크기를 조절합니다.

- HellowWorld를 클릭해서 상단 중앙의 원을 클릭해서 ListView 하단 중앙 원으로 가져갑니다.
- 이후 HelloWorld를 클릭해서 전체를 드래그해서 아래로 이동합니다.

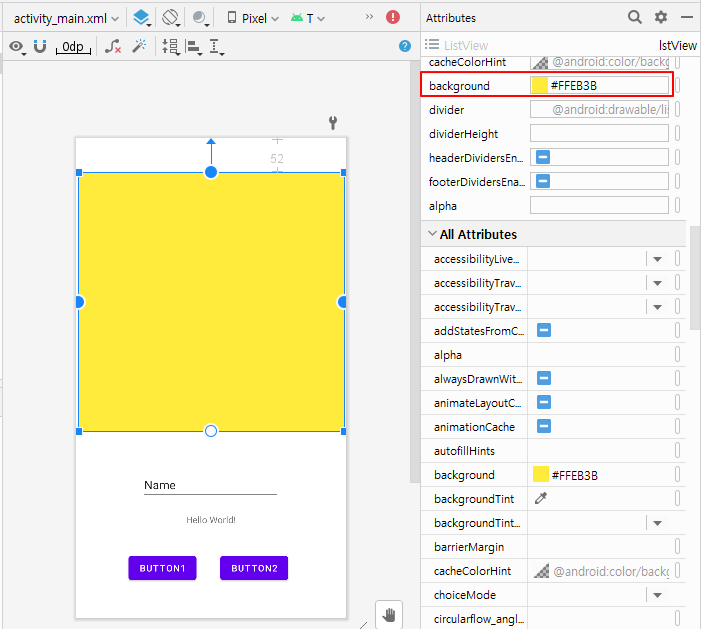
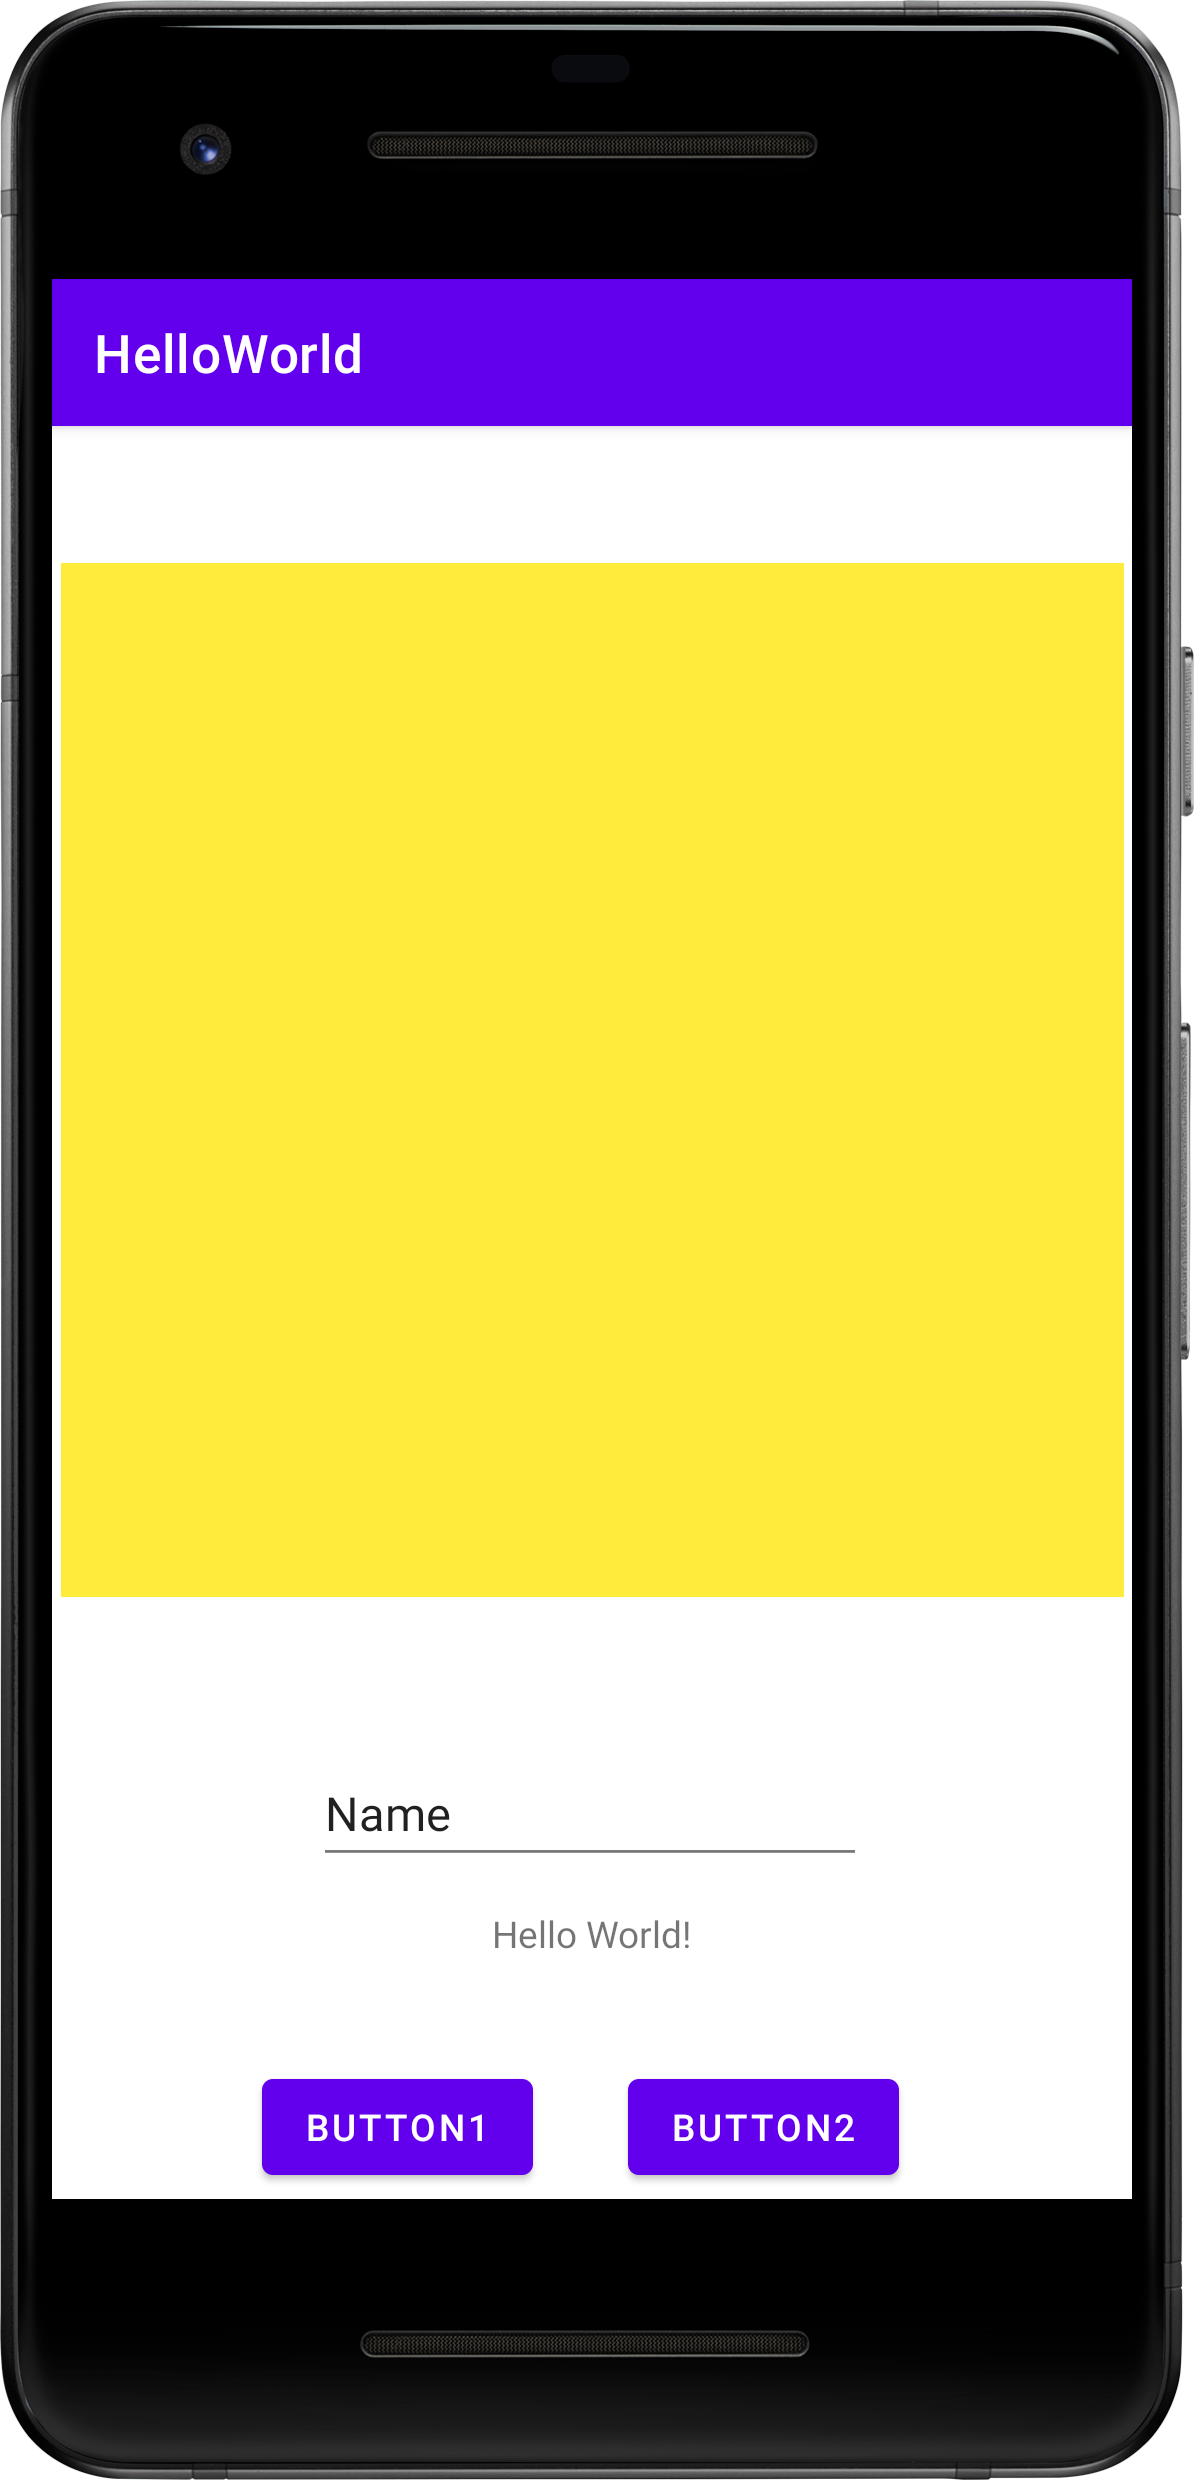
- ListView의 바탕색을 바꾸어 봅니다.
- Attributees에서 background에 #FFEB3B 를 입력하거나

버튼을 클릭해서

화면에서 색을 선택할 수 있습니다.
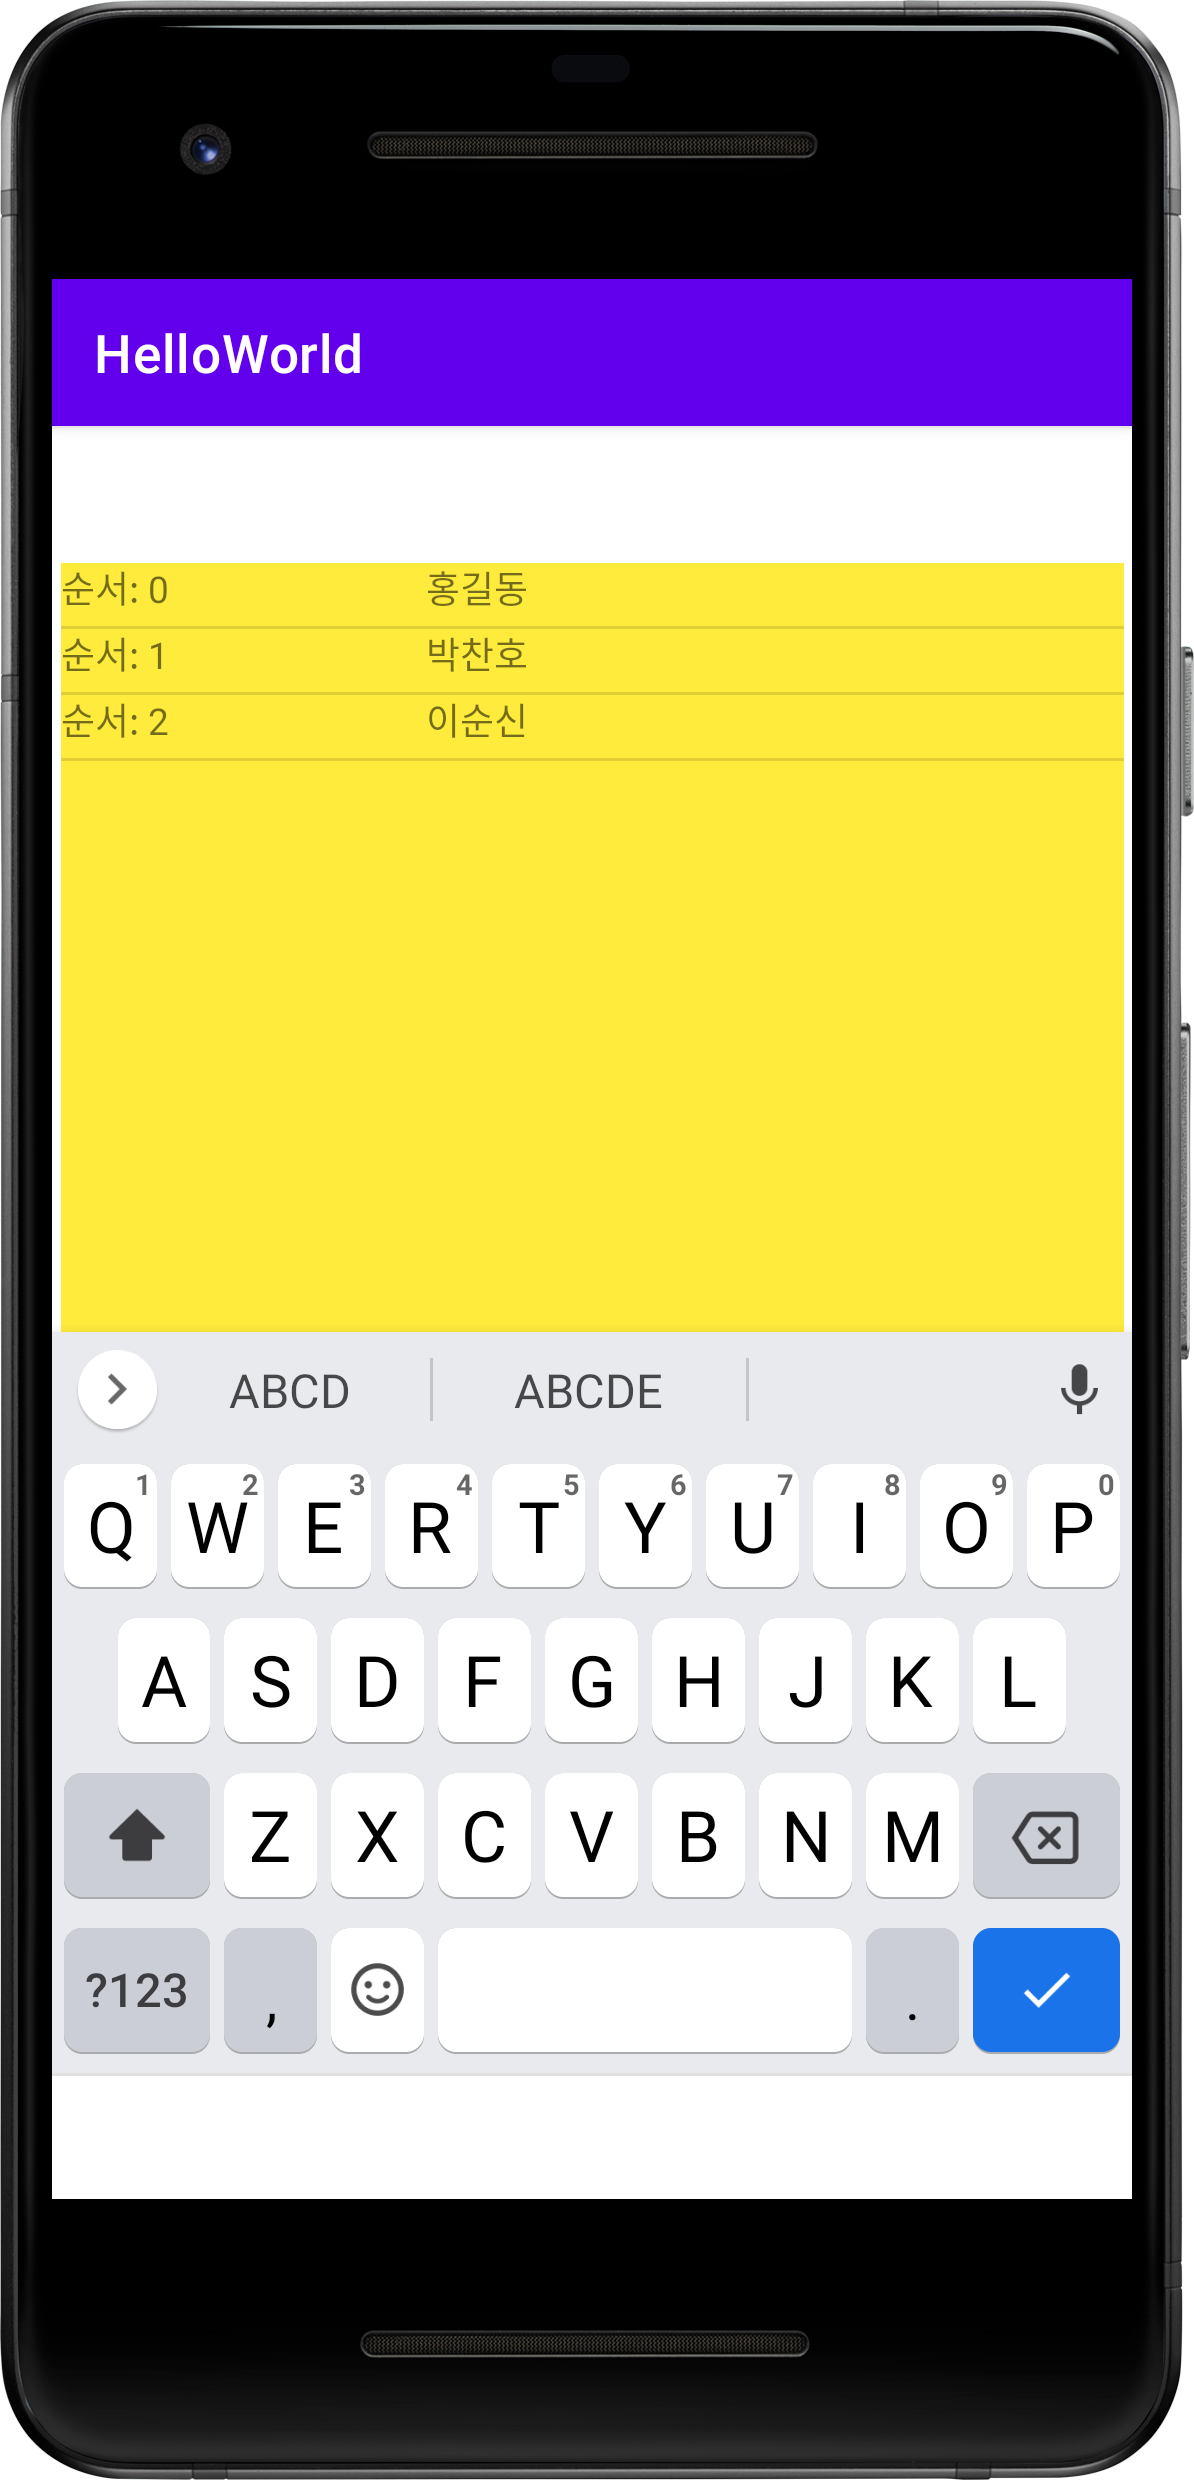
- 실행해보면 다음과 같이 위치와 ListView의 색이 바뀐것을 확인 할 수 있습니다.
■ ListView에 데이터 보여주기
- res / layout / New / Layout Resource File 를 클릭합니다.

- File_name 을 list_format으로 합니다. 그리고 OK 버튼을 클릭해합니다.


- lilst_format.xml 에서 TextView widget을 선택해서 다음과 같이 2개를 만듭니다.
- TextView1, TextView2도 위치를 잡아줍니다.

<?xml version="1.0" encoding="utf-8"?>
<androidx.constraintlayout.widget.ConstraintLayout xmlns:android="http://schemas.android.com/apk/res/android"
    xmlns:app="http://schemas.android.com/apk/res-auto"
    xmlns:tools="http://schemas.android.com/tools"
    android:layout_width="match_parent"
    android:layout_height="match_parent">

    <TextView
        android:id="@+id/textView1"
        android:layout_width="143dp"
        android:layout_height="24dp"
        android:text="TextView"
        app:layout_constraintStart_toStartOf="parent"
        app:layout_constraintTop_toTopOf="parent" />

    <TextView
        android:id="@+id/textView2"
        android:layout_width="270dp"
        android:layout_height="23dp"
        android:text="TextView"
        app:layout_constraintEnd_toEndOf="parent"
        app:layout_constraintStart_toEndOf="@+id/textView1"
        app:layout_constraintTop_toTopOf="parent" />
</androidx.constraintlayout.widget.ConstraintLayout>
- MainActivity.kt 에 다음 코드를 추가해 줍니다.

package com.example.helloworld

import androidx.appcompat.app.AppCompatActivity
import android.os.Bundle
import android.widget.Button
import android.widget.TextView
import android.widget.EditText
import android.widget.BaseAdapter
import android.widget.ListView
import android.content.Context
import android.view.LayoutInflater
import android.view.View
import android.view.ViewGroup

class MainActivity : AppCompatActivity() {
    override fun onCreate(savedInstanceState: Bundle?) {
        super.onCreate(savedInstanceState)
        setContentView(R.layout.activity_main)

        var button = findViewById<Button>(R.id.button1)
        var txtView = findViewById<TextView>(R.id.txtView)
        var txtEdit = findViewById<EditText>(R.id.editText1)
        var lstView = findViewById<ListView>(R.id.lstView)

        // lstView.adapter = MyCustomAdapter(this)
        val adapter = MyCustomAdapter(this)     // 데이터를 ListView에 연결하기 위해 Adapter 만듬.
        lstView.adapter = adapter                       // Adapter를 ListView에 지정

        button.setOnClickListener{
            // txtView.text = "안녕하세요!"
            txtView.text = txtEdit.text
            adapter.addItem(txtEdit.text.toString())    // 데이터 추가. 입력한 내용으로 추가
            adapter.notifyDataSetChanged()              // ListView 새로고침
        }
    }

    // Adapter class
    private class MyCustomAdapter(context: Context) : BaseAdapter() {
        private val mContext: Context

        //데이터 어레이
        private val names = arrayListOf<String>(
            "홍길동", "박찬호", "이순신"
        )

        init {
            mContext = context
        }

        override fun getCount(): Int {
            return names.size
        }

        override fun getItemId(position: Int): Long {
            return position.toLong()
        }

        override fun getItem(position: Int): Any {
            val selectItem = names.get(position)
            return selectItem
        }

        fun addItem(name: String){      // 데이터 추가 함수
            names.add(name)
        }

        override fun getView(position: Int, view: View?, viewGroup: ViewGroup?): View {
            val layoutInflater = LayoutInflater.from(mContext)
            // list_format.xml 파일을 지정
            val rowMain = layoutInflater.inflate(R.layout.list_format, viewGroup, false)

            val tvId = rowMain.findViewById<TextView>(R.id.textView1)
            val tvName = rowMain.findViewById<TextView>(R.id.textView2)
            tvId.text = "순서: " + position
            tvName.text = names.get(position)

            return rowMain
        }
    }
}
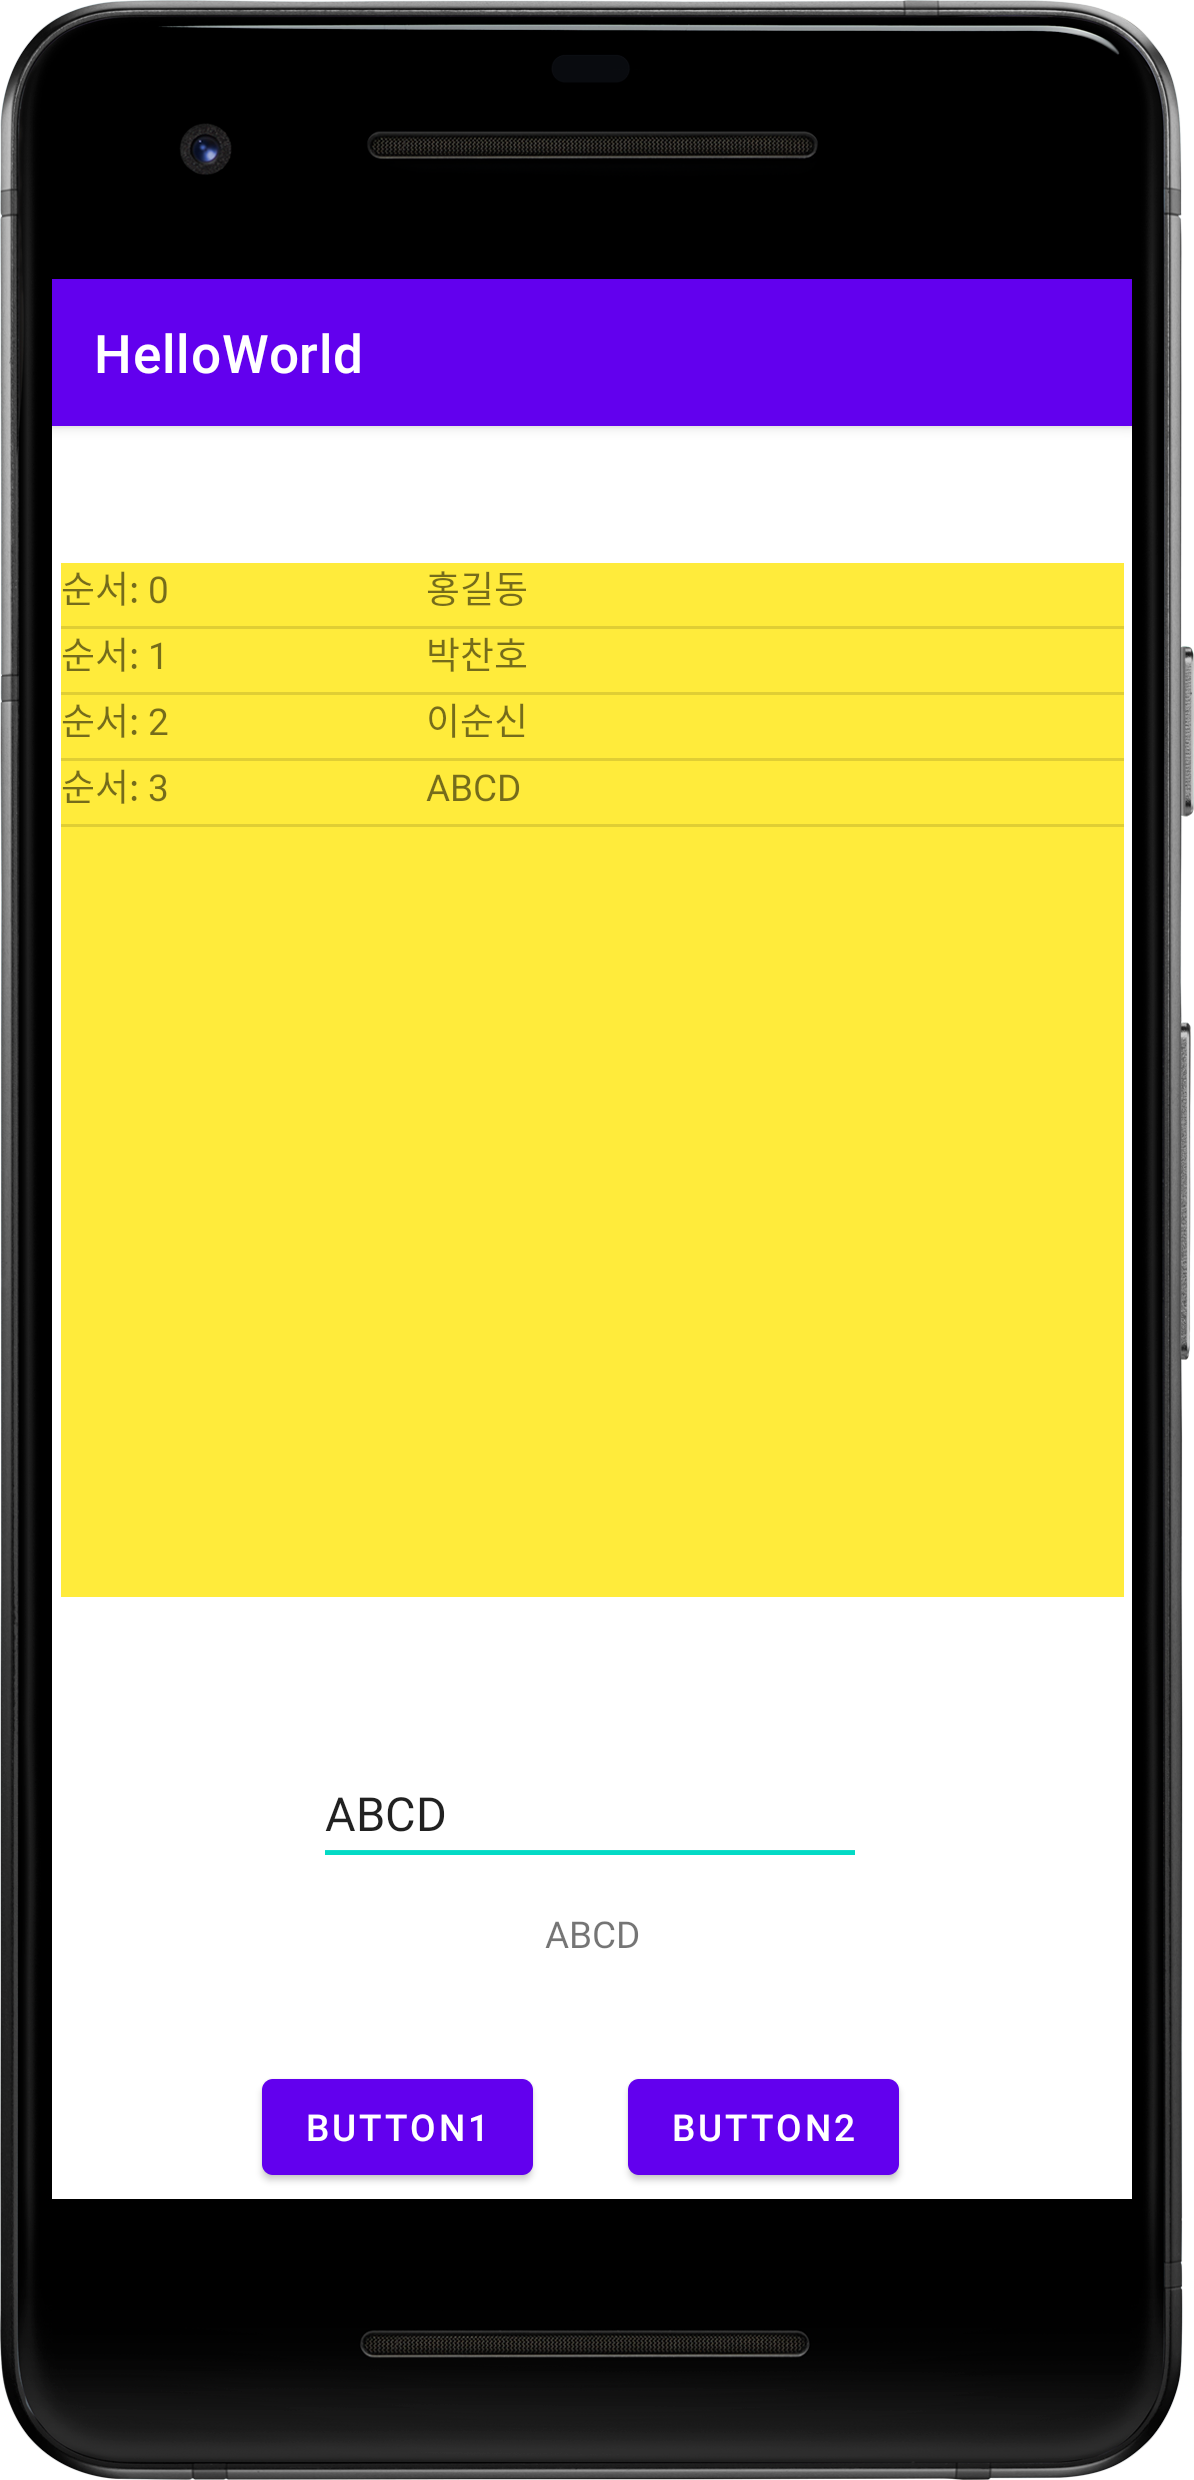
- 실행